How to create Geneious variant call reports
Geneious Reports
We have numerous clients who use Geneious for bioinformatics data analysis. They use Geneious for sequence alignments of their sample datasets against reference genomes and for the interpretation of Geneious variant call reports. We often receive requests for instructions on how to create the variant call reports in Geneious. We’ll describe here how to do this in case you have Geneious and want to try this yourself.
Instructions
We’ll assume you have already imported FastQ sample files into Geneious and run a sequence alignment algorithm on the samples.
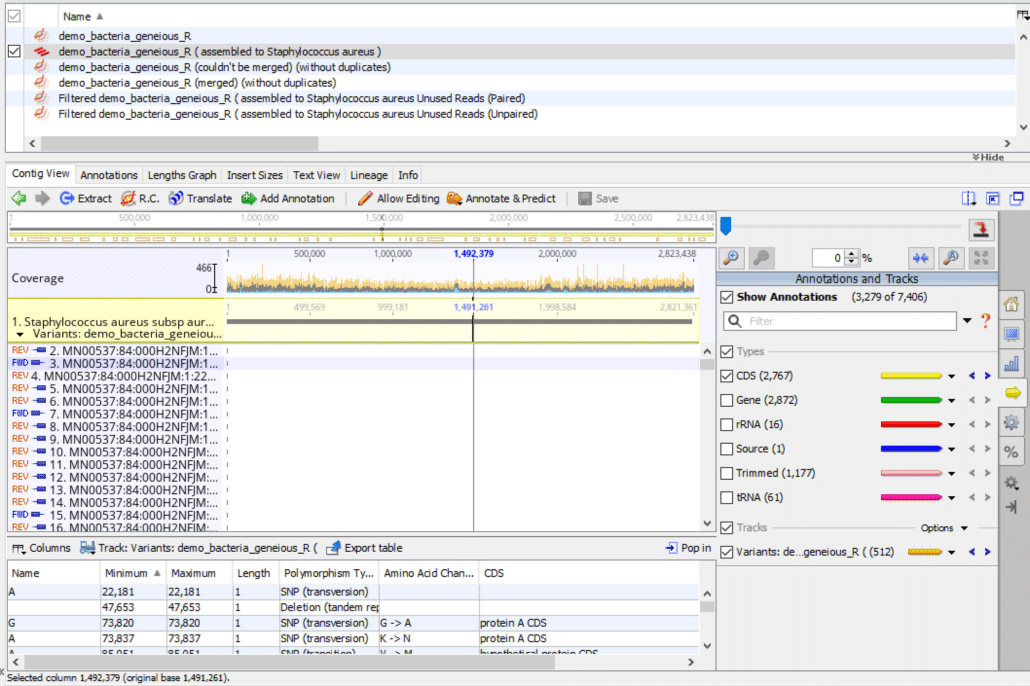
Fig. 1
As shown in Fig. 1, in the Document Table at the top of the screen, check the box next to the sequence alignment document. In the demo sample here it’s called:
- “demo_bacteria_geneious_R ( assembled to Staphylococcus aureus )”
Your alignment document of course will have a different name. This step will display the main Document Viewer.
- In the tab line above the Document Viewer click “Contig View“. This step will display the “Sequence / Alignment Viewer“.
- In the side panel control box along the right-hand side of the Document Viewer, click the yellow arrow for “Annotations and Tracks“. Check “Show Annotations“. Check “Types“. Check “CDS“. Uncheck all other tracks in the Types box. Check “Tracks“. Check “Variants“.

Fig. 2
As shown in Fig. 2, in the bottom panel, click the drop-down box “Track: Variants:“. Click the “Variants:” list item. This step will display a variants spreadsheet.

Fig. 3
As shown in Fig. 3, in the bottom panel, click “Columns“. This step will display a list box with a set of column names for the spreadsheet.
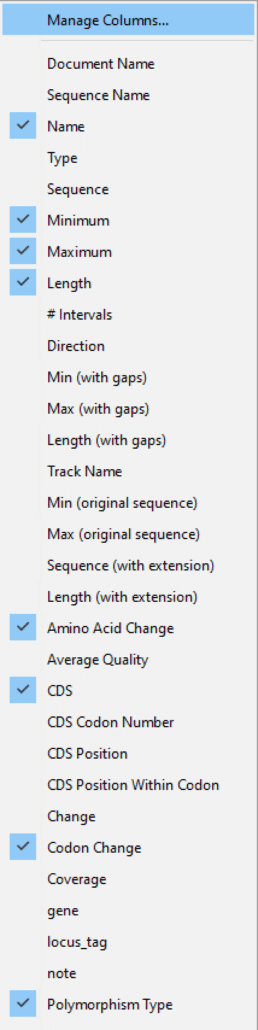
Fig. 4
As shown in Fig. 4, click “Manage Columns“.
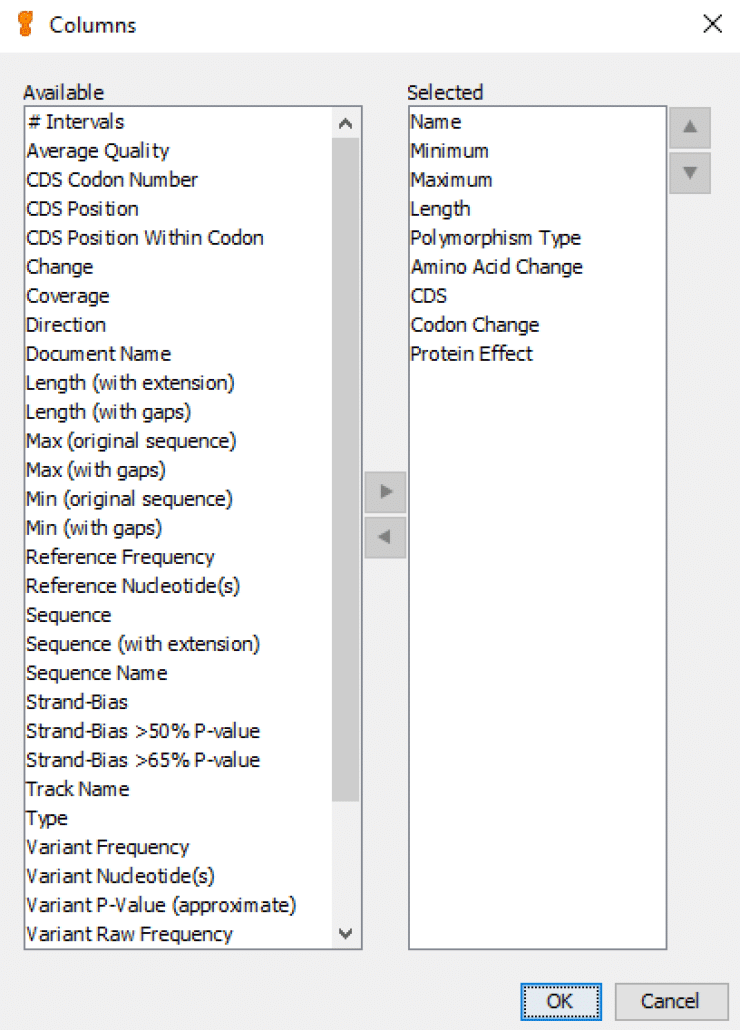
Fig. 5
As shown in Fig. 5, the left-hand list shows all of the available column names for the spreadsheet, and the right-hand list shows all of the selected columns. You can move column names from “Available” to “Selected“, and vice-versa, with the left and right arrows. And you can arrange the “Selected” column names with the up and down arrows. The column names shown in this “Selected” list are the default names that we typically include in standard Geneious variant call reports.

Fig. 6
As shown in Fig. 6, you can export the variant call spreadsheet to your local workstation. Click “Export table“.
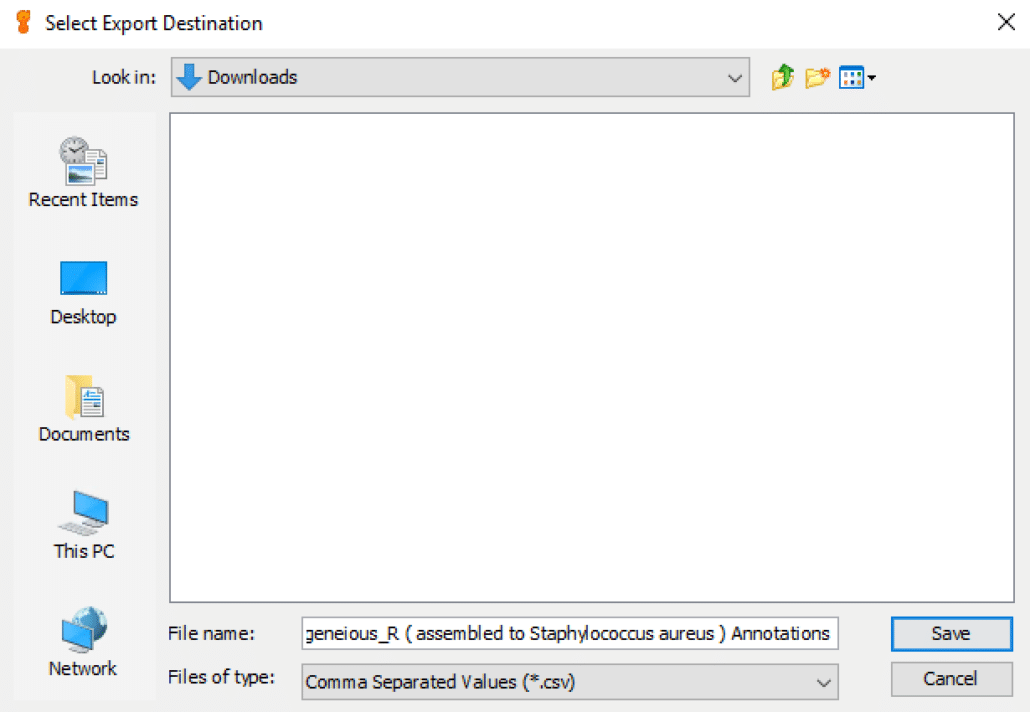
Fig. 7
As shown in Fig. 7, you can select the export destination folder under “Look In:” and either use the default file naming convention or change the file name in “File Name:“. In “Files of type:” you can choose to save the variant call report in either Excel CSV format (comma separated values) or Excel TSV format (tab-separated values). By default, we choose Excel CSV format.
Excel format
At this point, we usually convert the Excel CSV file to Excel XLS format. If you wish to do this, follow these instructions:
- Launch Excel
- Choose “File-> Open…”
- Navigate to the directory that contains the CSV file
- Highlight the CSV file (usually left-mouse click the filename)
- Choose “Open“
- Choose “File-> Save As...”
- In “File Format:” choose “Microsoft Excel 5.0/95 Workbook (.xls)“
- Choose “Save“
(The exact set of instructions may be slightly different depending on your workstation operating system).